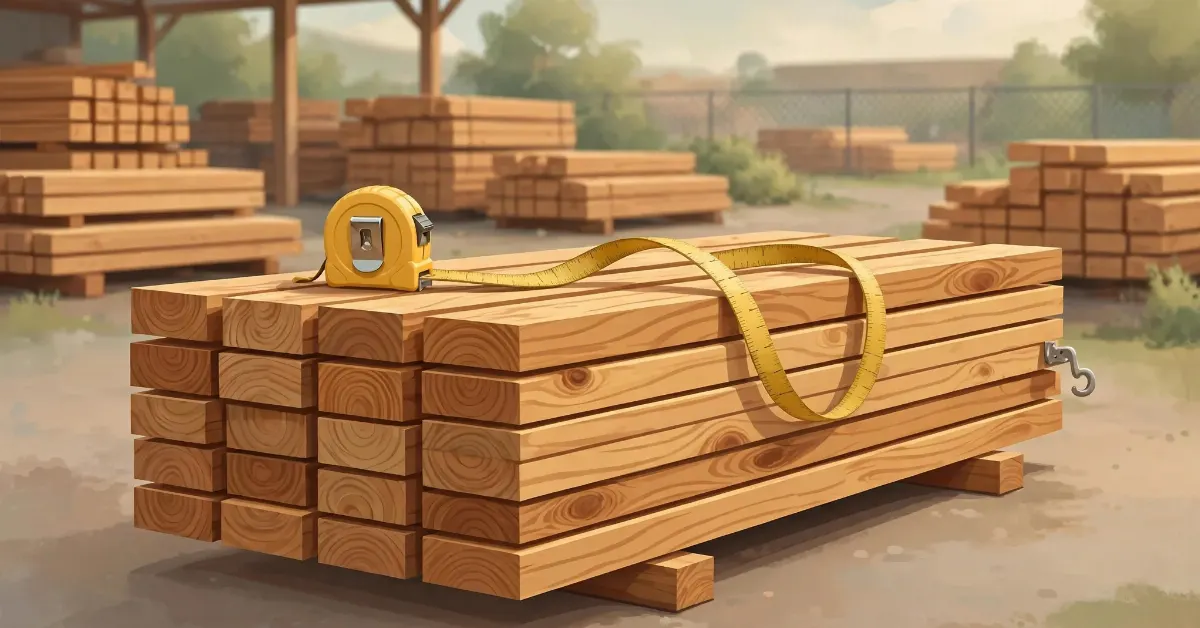
A 2×4 is actually 1.5 × 3.5 inches. The name stamped on the lumber rack is the nominal size — the rough-sawn dimension the board started out with — while the actual size is what remains after the wood has been dried and planed smooth. Once you understand that single distinction, every board in the lumber aisle starts making sense, and you will never again be caught off guard when your tape measure disagrees with the label.
This guide lays out the real dimensions of standard dimensional lumber, explains exactly where the missing wood goes, and covers plywood and OSB sheet sizes so you can plan projects with numbers you can trust. Whether you are framing a wall, building a workbench, or just trying to figure out why the “2-inch” side of your board is only an inch and a half, you will find the answers here.
1. Dimensional Lumber Chart: Nominal vs Actual Size
Start with the numbers. This chart shows the most common dimensional lumber sizes: the nominal name you ask for at the store, the actual dimensions you will measure with a tape, the metric equivalents, and the cross-section area of each board.
| Nominal size | Actual size (inches) | Actual size (mm) | Cross-section area |
|---|---|---|---|
| 2×4 | 1.5 × 3.5 in | 38.1 × 88.9 mm | 5.25 sq in |
| 2×6 | 1.5 × 5.5 in | 38.1 × 139.7 mm | 8.25 sq in |
| 2×8 | 1.5 × 7.25 in | 38.1 × 184.2 mm | 10.875 sq in |
| 4×4 | 3.5 × 3.5 in | 88.9 × 88.9 mm | 12.25 sq in |
The pattern is immediate: every board in the 2× family planes down to exactly 1.5 inches thick — only the width changes. A 2×4 loses half an inch of thickness and half an inch of width from its nominal size; a 2×8 loses half an inch of thickness and three-quarters of an inch of width. The 4×4, the classic fence-post and deck-post size, finishes at a true 3.5 × 3.5 inches, a full half inch shy of its name in both directions.
Bookmark this chart or keep it on your phone. These four sizes cover the overwhelming majority of what home centers stock and what DIY projects call for: wall framing, deck framing, shelving, workbenches, raised beds, and posts. When a project plan says “2×6,” you now know to buy the board labeled 2×6 and cut to the reality of 1.5 × 5.5 inches.
2. Nominal vs Actual: Why the Names Don’t Match the Tape
The mismatch is not a scam, and it is not sloppy manufacturing — it is the predictable result of how wood becomes lumber. Understanding the journey from log to finished board makes the numbers feel inevitable rather than confusing.
It starts at the sawmill, where logs are rough-cut into boards at the full nominal dimensions — a genuine 2 inches by 4 inches, green and wet. Freshly cut lumber is saturated with moisture, and as it dries — whether air-dried in a yard or kiln-dried in a controlled chamber — the wood shrinks. Drying is essential: it stabilizes the board so it will not warp, twist, or continue shrinking after you build with it.
After drying comes surfacing. The rough, dried board is run through a planer that shaves each face smooth and brings every board to a uniform, predictable dimension. This surfacing step removes the saw marks and high spots and, crucially, takes off the last fraction of an inch. By the time a 2×4 has been dried and surfaced on all four sides, it measures a consistent 1.5 × 3.5 inches — the same in every lumberyard in the country.
So the nominal size is really a historical name for the rough green board, and the actual size is the finished product you take home. The system persists because everyone in the trade — mills, yards, builders, and building codes — speaks the same language. When a plan calls for 2×4 framing, every contractor knows it means 1.5 × 3.5 inches of actual wood.
It helps to think of the nominal name as a category rather than a measurement. “2×4” tells you which family the board belongs to and roughly how stout it is; the actual dimensions tell you what will show up on your tape. Nobody in the trade expects a 2×4 to measure two by four — the name is simply the handle everyone grabs.
3. The 2× Family: Standard Thickness, Varying Widths
Look again at the chart and notice the most useful pattern in the lumber aisle: thickness is standardized. Every 2× board — whether it is a 2×4, a 2×6, or a 2×8 — finishes at exactly 1.5 inches thick. That consistency is deliberate. It means wall framing, joists, and rafters all present the same 1.5-inch nailing face, so fasteners, hangers, and brackets designed for “two-by” lumber fit every member the same way.
What changes is the width, and with it the board’s job. A 2×4 at 3.5 inches wide is the workhorse of wall framing — light, cheap, easy to handle, and strong enough for most interior and exterior walls. Step up to a 2×6 at 5.5 inches and you get deeper wall cavities that hold more insulation, plus a beefier structural member for load-bearing walls and headers. A 2×8 at 7.25 inches wide moves into floor joist and rafter territory, where the extra depth carries heavier loads across longer spans without sagging.
The relationship between width and strength is worth appreciating. A board’s resistance to bending grows much faster with depth than with thickness, which is why joists and rafters are always installed with the wide dimension vertical. That is the entire logic of the 2× family: keep the thickness at a handy 1.5 inches for nailing and handling, and let the width do the structural work. When you stand a 2×8 on edge as a joist, you are putting all 7.25 inches of actual depth to work.
The 4×4 stands apart from this family logic. At an actual 3.5 × 3.5 inches, it is the go-to for posts — deck posts, fence posts, mailbox posts — anywhere a chunky square section is needed. Like the 2× family, it gives up half an inch per face to drying and planing, which is why the tape reads three and a half instead of four. Square sections like this excel at carrying compressive loads straight down, which is exactly what a post does.
4. Plywood and OSB Sheet Sizes
Sheet goods play by simpler rules than dimensional lumber: the face dimensions are honest. Plywood is sold in sheets measuring 4 × 8 feet — 32 square feet per sheet — and the thicknesses step through a standard range from 1/4 inch up to 3/4 inch. OSB (oriented strand board) panels are sold in the same 4 × 8 ft sheet size, so the layout math below works for both.
| Sheet size | Thickness (inches) | Thickness (mm) |
|---|---|---|
| 4 × 8 ft | 1/4 in | 6.35 mm |
| 4 × 8 ft | 3/8 in | 9.53 mm |
| 4 × 8 ft | 1/2 in | 12.7 mm |
| 4 × 8 ft | 5/8 in | 15.88 mm |
| 4 × 8 ft | 3/4 in | 19.05 mm |
Thickness choice follows the job. The 1/4-inch sheets suit drawer bottoms, cabinet backs, and curved work where flexibility matters. The 3/8-inch thickness works for lighter sheathing and paneling. The 1/2-inch sheet is the all-rounder — shelving, wall sheathing, and general utility. Step up to 5/8-inch for stiffer sheathing and subfloor applications, and reserve 3/4-inch for subfloors, workbench tops, stair treads, and anything that must resist sagging under load.
Because every sheet is a true 4 × 8 feet, laying out cuts is straightforward arithmetic — a welcome change after the nominal-versus-actual puzzle of dimensional lumber. Need to sheath a 12-foot wall? Three sheets end to end, with no mystery inches hiding anywhere. That honesty is why sheet goods are many beginners’ favorite material: what you measure is what you get.
One practical note: sheet thickness is the actual thickness, but like lumber it carries a manufacturing tolerance, so a “3/4-inch” sheet may measure a hair under. For most construction that hair does not matter; for fine cabinetry, measure your actual sheet before cutting dadoes and grooves to fit it.
5. From Tree to True Size: How a Board Earns Its Dimensions
To really internalize nominal versus actual, walk a board through the mill in your mind. A log arrives at the sawmill and is broken down by the head saw into rough boards cut to the full nominal size — a true 2 × 4 inches, more or less, with rough saw-marked faces. At this stage the wood is green, meaning its cells are full of water, and it is at its largest.
Next comes drying. Green lumber destined for construction is typically kiln-dried, which drives the moisture content down to a stable level over days or weeks in a heated chamber. As water leaves the cell walls, the board shrinks — mostly across its width and thickness, barely at all along its length. This directional quirk of wood is why a board’s length is the one dimension you can take at face value, while width and thickness always come up short. Drying also does something invisible but crucial: it locks the board’s shape so your finished project does not keep moving with the seasons.
Finally, the dried, shrunken, rough board goes through the planer. Cutters shave every face until the board is smooth, straight, and — most importantly — identical to every other board of its size. The planer is set to the industry’s standard finished dimensions, so a 2×4 emerges at 1.5 × 3.5 inches whether it was milled in Oregon or Georgia. What the planer removes is not waste in the careless sense; it is the price of uniformity, and uniformity is what makes modern framing fast and reliable. Imagine trying to frame a house if every stud were a slightly different size — shimming every joint, fighting every wall into plumb. Standardized actual dimensions are what make assembly-line construction possible.
This is also why the old-timers’ stories about “real” 2×4s are true. A century ago, much lumber was sold rough-sawn and undried, so a 2×4 really did measure close to two by four. As kiln drying and surfacing became universal, the finished sizes settled at today’s standards while the names stayed put. The name is a fossil; the dimensions are modern engineering.
6. Why Actual Dimensions Matter for Your Projects
Here is where the theory meets the workbench. Designing with nominal sizes instead of actual ones is the single most common measuring mistake in DIY carpentry, and it compounds fast. Frame a wall assuming studs are 2 inches thick and your 16-inch on-center layout drifts; cut joinery to nominal widths and every joint gapes; order trim for a nominal opening and it arrives long.
Consider a simple project: a shelf unit with sides made from 2×8s. If you cut your shelves to fit a nominal 8-inch opening, each shelf will be three-quarters of an inch too long — because the actual board is 7.25 inches wide. Multiply that error across a bookcase, a deck frame, or a run of fence posts, and the project simply does not go together. Professional carpenters avoid this by working from actual dimensions from the first sketch, and by measuring the real boards on site before cutting a single piece.
Actual dimensions also govern structural math. The load a joist can carry depends on its true depth — 7.25 inches for a 2×8, not 8 — so span tables, building codes, and engineering calculations all use actual sizes. This is one more reason the finished dimensions are standardized so tightly: a 2×8 from any mill must be 1.5 × 7.25 inches, because structures are designed around exactly that section. A joist that ran narrow would be weaker than the tables assume; one that ran wide would not fit the hangers.
The same discipline applies to fasteners and hardware. Joist hangers, post bases, and framing connectors are stamped for actual dimensions — a hanger made for a 2×8 expects a board 1.5 inches thick and 7.25 inches deep. Buy hardware by the nominal name and it fits, because the hardware makers are in on the same convention. But if you ever mill your own lumber or buy rough-sawn stock, all bets are off: measure everything and buy adjustable or custom hardware.
Finally, actual dimensions matter when lumber meets other materials. A doorway framed with 2×4s is 3.5 inches deep at the jamb; drywall, trim, and door frames are all manufactured to suit. The whole ecosystem of building products — from electrical boxes to insulation batts — is dimensioned around actual lumber sizes. It is a quiet standardization miracle, and it only works because everyone builds to the tape, not the name.
7. Buying and Measuring Lumber Like a Pro
Armed with the charts above, you can walk into the lumber aisle with confidence — but a few field habits separate smooth projects from frustrating ones. First, always verify with a tape. Mills hold tight tolerances, but it costs you ten seconds to confirm that the 2×6 in your cart is truly 1.5 × 5.5 inches. Measure thickness and width on the actual boards you are buying, especially if precise joinery is in the plan. If you are new to reading the tool, our guide on how to read a measuring tape will get you fluent in the sixteenths and eighths that lumber dimensions live in.
Second, remember that lumber is sold by the lineal foot — you pay for length, with width and thickness fixed by the size name. When you see a board marked as a 2×4, the “2×4” describes the cross-section and the length is stated separately in feet. If you need a refresher on the unit itself, see how long a foot is and how it divides into the inches you will be measuring on the board’s face. Buying a 12-foot 2×4 means one board, 1.5 × 3.5 inches in section, twelve feet long — now you can decode the whole tag.
Third, sight down every board before you buy it. Look along its length for bows, twists, cups, and crooks — dimensional lumber is a natural product, and even correctly sized boards can be crooked. A straight 1.5 × 3.5-inch 2×4 builds a straight wall; a banana-shaped one fights you at every nail. Pick the straightest boards in the stack, check the ends for large knots and splits, and your actual dimensions will actually matter.
Fourth, buy a little extra and acclimate it. Wood moves with humidity, so stack your lumber flat with spacers in the space where you will build for a few days before cutting. And purchase roughly ten percent more than your cut list demands — miscuts, knots in bad places, and boards that looked straight in the store but were not will consume it. Pros call this the waste factor; beginners call it the reason the project stalled on a Sunday evening.
Fifth, store sheet goods flat and dry. A 4 × 8 ft sheet of 1/2-inch plywood leaning against a damp garage wall will bow into a potato chip within weeks. Lay sheets flat on level blocking, keep them off concrete, and cover the stack. Plywood’s honest dimensions only stay honest if you treat the material with respect.
8. Frequently Asked Questions
What are the actual dimensions of a 2×4?
A 2×4 actually measures 1.5 × 3.5 inches (38.1 × 88.9 mm). The “2×4” is the nominal size — the rough-cut dimension before drying and planing.
Why is a 2×4 not really 2×4 inches?
The board starts at a full 2 × 4 inches when rough-sawn green, then shrinks as it dries and loses more material when planed smooth on all four sides. The finished, standardized size is 1.5 × 3.5 inches.
What size is a 4×4 really?
A 4×4 post measures an actual 3.5 × 3.5 inches (88.9 × 88.9 mm) — half an inch under its nominal size in both directions.
What are the standard plywood sheet sizes?
Plywood sheets measure 4 × 8 feet, with standard thicknesses of 1/4, 3/8, 1/2, 5/8, and 3/4 inch. OSB panels are sold in the same 4 × 8 ft sheet size.
9. Final Thoughts
The lumber aisle stops being confusing the moment you learn its one great open secret: the name on the tag is the nominal size, and the tape never lies about the actual one. A 2×4 is 1.5 × 3.5 inches, a 2×6 is 1.5 × 5.5, a 2×8 is 1.5 × 7.25, and a 4×4 is 3.5 × 3.5 — not because anyone is shortchanging you, but because drying and planing turn rough green boards into the straight, uniform, dependable material that modern building relies on. Plywood keeps things simpler at an honest 4 × 8 feet in thicknesses from 1/4 to 3/4 inch. Design with actual dimensions, verify with your tape, and every cut will land exactly where you planned it.

I’m Marcus Kane, a measurement content specialist at MeasuresIt.com. I write clear, accurate, and practical articles about measurements, dimensions, conversions, and everyday size comparisons, making complex topics simple and easy to understand.