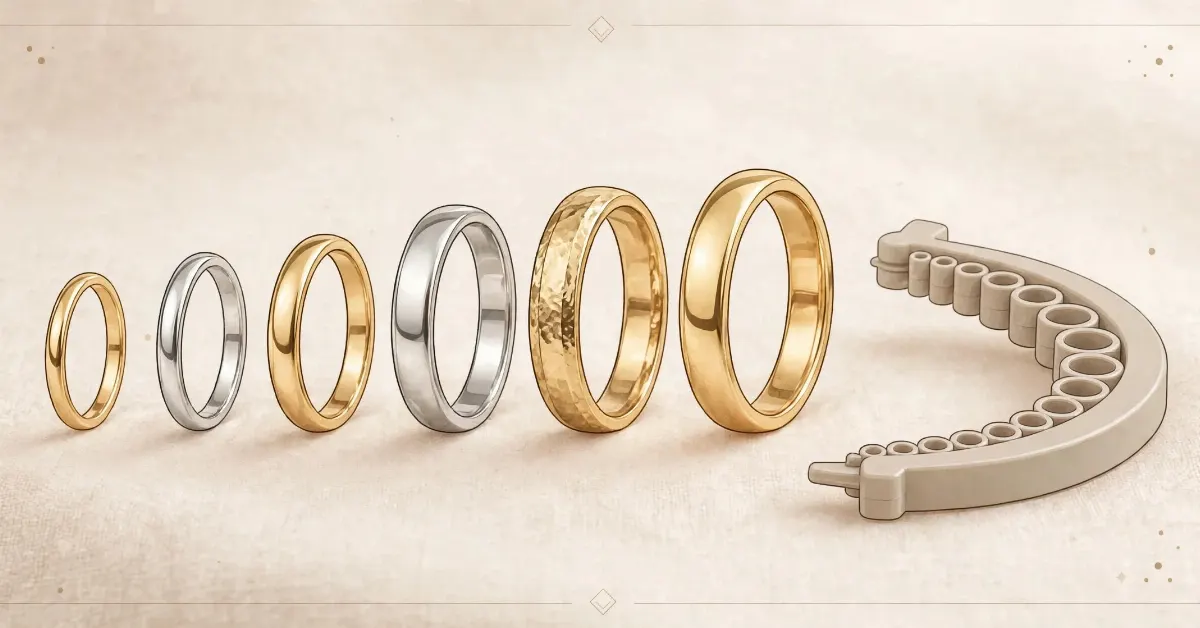
If you need a quick answer: a US size 6 ring has an inner diameter of about 16.51 millimeters, and a US size 7 measures about 17.35 millimeters. US ring sizes move in steady, predictable steps – roughly four-tenths of a millimeter of inner diameter per whole size – so once you know your finger’s millimeter measurement, finding your size on the chart below is the easy part.
The hard part is getting an honest millimeter measurement in the first place. Most sizing mistakes happen long before anyone looks at a chart: a stretchy piece of yarn wrapped around a knuckle, a reading taken first thing in the morning when fingers are at their slimmest, or a printed size chart used at the wrong print scale. Jewelers get around all of this with steel ring sizers and graduated mandrels, but you can get a dependable result at home with far simpler tools – a strip of paper, a millimeter ruler, and, ideally, a ring you already own that fits the finger you are sizing. Below you will find the complete US ring size chart from size 3 to size 13 with exact inner diameters, the UK and EU equivalents for international orders, and step-by-step instructions for each at-home measuring method, including the wide-band adjustment that catches so many buyers off guard.
US Ring Size Chart: Sizes 3-13 with Inner Diameters
The table below lists whole US sizes from 3 through 13 with their standard inner diameters in millimeters – the measurement that actually determines how a ring fits – plus the inner circumference and the matching UK and EU sizes. European sizes are handy because they sit very close to the inner circumference in millimeters, which gives you a quick way to cross-check a conversion. If your measurement falls between two rows, jewelers generally advise sizing up: a ring that is slightly loose can still be worn comfortably, while one that is too tight simply will not go on.
| US size | Inner diameter (mm) | Inner circumference (mm) | UK size | EU size |
|---|---|---|---|---|
| 3 | 14.05 | 44.1 | F-G | 44 |
| 4 | 14.86 | 46.7 | H-I | 47 |
| 5 | 15.70 | 49.3 | J-L | 50 |
| 6 | 16.51 | 51.9 | M-N | 52 |
| 7 | 17.35 | 54.5 | O-P | 54 |
| 8 | 18.14 | 57.0 | Q-S | 57 |
| 9 | 18.96 | 59.6 | S-U | 59 |
| 10 | 19.84 | 62.3 | T-V | 62 |
| 11 | 20.68 | 65.0 | V-X | 65 |
| 12 | 21.49 | 67.5 | Y-Z | 67 |
| 13 | 22.33 | 70.2 | Z+ | 70 |
Half Sizes Compared: 7 In-Between Measurements
Ring sizes do not stop at whole numbers, and that is good news for anyone whose finger lands between two rows of the main chart. Half sizes exist for exactly this situation – the size 7 feels snug but the 8 spins – and each half step adds about two-tenths of a millimeter to the inner diameter. That sounds tiny, and it is, but on a finger it is often the difference between a ring that stays centered and one that migrates around all day. The seven half sizes below are the ones jewelers reach for most often, and they are worth checking before you settle on a whole size, particularly if you are buying a wider band where a little extra room matters.
| Half size | Inner diameter (mm) | Sits between |
|---|---|---|
| 3.5 | 14.40 | 3 and 4 |
| 5.5 | 16.10 | 5 and 6 |
| 6.5 | 16.92 | 6 and 7 |
| 7.5 | 17.75 | 7 and 8 |
| 8.5 | 18.53 | 8 and 9 |
| 9.5 | 19.35 | 9 and 10 |
| 11.5 | 21.08 | 11 and 12 |
8 Popular Sizes: Diameter vs. Circumference
Diameter and circumference describe the same ring in two different ways, and knowing both helps because your tools measure different things. A ruler or caliper reads diameter – the straight distance across the inside of the band. A paper strip or flexible tape reads circumference – the distance around the finger. Since circumference is simply diameter multiplied by pi, the two always travel together, and the eight sizes below show the relationship across the range most adults actually wear. If you measured your finger with a strip of paper, find your millimeter reading in the right-hand column and read your US size from the left.
| US size | Inner diameter (mm) | Inner circumference (mm) |
|---|---|---|
| 4 | 14.86 | 46.7 |
| 5 | 15.70 | 49.3 |
| 6 | 16.51 | 51.9 |
| 7 | 17.35 | 54.5 |
| 8 | 18.14 | 57.0 |
| 9 | 18.96 | 59.6 |
| 10 | 19.84 | 62.3 |
| 12 | 21.49 | 67.5 |
1. Measure Your Finger with a Paper Strip or String
Of the at-home methods, the paper strip is the one jewelers recommend most, because paper does not stretch the way string or yarn can. Cut a strip of ordinary printer paper about half an inch wide and four to five inches long – long enough to wrap around the base of the finger with room to spare. If you prefer string, use dental floss or a smooth, non-stretchy cord rather than yarn or elastic thread, both of which will quietly give you a smaller reading than your finger actually is.
Wrap the strip snugly around the base of the finger you plan to wear the ring on, keeping it close to the knuckle but not on top of it. It should feel secure without digging in – imagine the fit of a ring you would be happy wearing all day. Mark the exact point where the end of the strip overlaps, then lay the strip flat and measure from its end to the mark in millimeters. That number is your finger’s circumference; divide it by 3.14 to get the diameter, or simply match the circumference to the right-hand column of the chart above. If you are working with a flexible tailor’s tape instead of paper, it reads circumference directly, and our guide on how to read a measuring tape will help you interpret the millimeter markings correctly.
Repeat the whole process two or three times. Fingers are not perfectly round and the strip can sit slightly differently each time, so averaging a few readings gives you a steadier number. If your readings keep landing between sizes, note the larger one – you can verify it against a ring you already own using the method below.
2. Measure a Ring You Already Own
If you own a ring that already fits the finger you are shopping for, measuring it is the most accurate at-home method there is – more reliable than any strip of paper, because the ring’s shape already accounts for your knuckle and how you like a band to sit. The key detail is the finger: fingers differ in size even on the same hand, and your dominant hand usually runs slightly larger, so the ring needs to fit the exact finger that will wear the new one.
Lay the ring on a flat ruler marked in millimeters and read the distance from one inside edge of the band to the other, straight across the center. Read at eye level to avoid parallax error, and take the measurement a couple of times, rotating the ring in case the band is very slightly out of round. If you do not trust your eyes against the tiny markings, trace the inside of the ring onto paper with a sharp pencil, then measure across the circle you drew.
Match the millimeter reading to the inner diameter column in the main chart above, and you have your US size. When the reading falls between two sizes, the standard advice applies: choose the larger size, especially if the new ring will be wider than the one you measured.
3. Convert Between US, UK, and EU Sizes
Ring sizing is one of those corners of the measurement world where three different systems describe the same physical thing. The United States uses plain numbers, usually in half-size steps, where each whole size represents a fixed increase in inner diameter. The United Kingdom uses letters, running from around F for the smallest adult sizes up past Z for the largest, with half letters filling the gaps. Continental Europe skips the abstraction entirely and stamps the ring with its inner circumference in millimeters – so an EU 54 ring has an inside circumference of about 54 millimeters.
The conversion chart at the top of this guide maps all three systems against the same millimeter diameters, which is the only truly universal language of ring size. When you order from an international seller, find your millimeter measurement first and read across to their system rather than converting from one size label to another – that extra hop is where rounding errors creep in. And if a seller lists sizes in inches rather than millimeters, convert carefully: one inch equals exactly 25.4 millimeters, so a sixteenth of an inch is already more than a full ring size of difference. Our inches reference can help you sanity-check those conversions before you commit to an order.
One caution: equivalents can vary slightly between manufacturers, particularly at the large end of the UK letter scale. If you are between sizes on a conversion chart, confirm with the seller’s own chart or ask for the inner diameter in millimeters – any reputable jeweler will provide it.
4. Adjust for Wide Bands
Here is the detail that surprises the most buyers: the width of the band changes how a size fits. A thin 2-millimeter band and a broad 8-millimeter band stamped with the same size will feel noticeably different on the finger, because the wider band covers more skin and creates more friction as it slides on. The effect is real enough that jewelers have a rule of thumb for it – for bands around 6 millimeters wide or wider, consider ordering a half size larger than your measured size.
Comfort-fit bands, which are slightly domed on the inside rather than flat, partially offset this by reducing contact with the skin, but they do not erase it entirely. If you are choosing between a delicate stacking ring and a substantial band, do not assume one measurement serves both; the wide band will almost always want that extra half size.
This matters most for rings that cannot be resized later – eternity bands, tungsten and titanium rings, and rings with stones set all the way around. With those, the wide-band adjustment is not a refinement; it is the difference between a ring you wear and a ring that lives in a drawer.
5. Measure at the Right Time of Day
Your fingers are not the same size all day, which is one reason two careful measurements can disagree. Fingers tend to be slimmest in the morning and in cold weather, and they swell with heat, exercise, salty food, and even a long day of typing. A ring sized from a chilly morning measurement can feel uncomfortably tight by a warm afternoon – and since you will wear the ring through both, the afternoon is the measurement that counts.
The practical routine jewelers suggest is simple: measure in the late afternoon or evening, at normal room temperature, when your hands are at their everyday size. Do not measure right after exercise, a hot shower, or coming in from the cold, and do not measure when your hands are swollen from travel or excess salt. If your knuckles are noticeably larger than the base of your finger, size for the knuckle – the ring has to get past it – but choose the smallest size that still slides over comfortably, so it does not spin freely once it is on.
Whatever method you use, measure two or three times on different days before ordering, especially for an expensive or hard-to-resize ring. Consistency across readings is the best sign your number is right.
6. Avoid These Common Measuring Mistakes
Most wrong sizes trace back to a short list of avoidable errors. The classic is the stretchy string: yarn, elastic cord, or ribbon that elongates as you pull it snug, quietly shaving millimeters off your reading and delivering a ring a full size too small. Paper strips and non-stretchy cord exist precisely to avoid this. Second is measuring the wrong finger – or the right finger on the wrong hand. Your ring finger on your dominant hand can easily run a half size larger than the same finger on your other hand, so always measure the exact finger that will wear the ring.
Third is rounding down. When a measurement lands between sizes, optimism says take the smaller; experience says take the larger, because fingers swell and rings do not stretch. Fourth is the printer problem: printable ring-size charts and ring sizers only work if printed at exactly 100 percent scale, and most printers and PDF viewers quietly resize the page. If you use one, verify it against a ruler before trusting it.
Finally, do not measure once and order. A single reading captures one moment – one temperature, one time of day. Two or three readings, taken the way jewelers actually measure, turn a guess into a reliable number. Getting comfortable with small, precise measurements pays off well beyond jewelry; our overview of everyday measurements is a good next read if you want to sharpen that skill generally.
Ring Size FAQs
What should I do if I am between two sizes?
Order the larger size. Fingers swell with heat, activity, and time of day, but they rarely shrink below your morning measurement – so the larger of two candidate sizes is the safer bet for everyday comfort. This is doubly true for wide bands and for rings you cannot easily resize, like eternity bands or tungsten rings. If the larger size feels slightly loose when you first try it, remember that a ring should slide over the knuckle with a little push; a touch of ease there is normal, not a sign the size is wrong.
Should I size up for a wide band?
In most cases, yes – about a half size for bands around 6 millimeters wide or wider. A wide band covers more skin and creates more friction going on, so the same nominal size feels tighter than it would in a thin band. Comfort-fit interiors, which are gently domed inside, reduce the effect but do not eliminate it. If you are choosing a wide band in a metal or style that cannot be resized, getting this right up front matters more than usual.
Can a ring be resized if I get the size wrong?
Many can. Plain gold, silver, and platinum bands are usually straightforward for a jeweler to size up or down by about one size, sometimes more. But several popular styles resist resizing: eternity bands with stones all the way around, tension-set rings, and rings made from tungsten, titanium, or stainless steel generally cannot be resized without compromising the ring. When in doubt, ask the jeweler before you buy – and for a ring that cannot be resized, measure twice using two different methods.
How snug should a new ring feel?
Snug enough that it needs a gentle push to slide over your knuckle, and secure enough that it does not spin freely or slide off on its own – but loose enough to turn on your finger with slight resistance. Your finger should not bulge around the band, and you should not need soap or a struggle to remove it at the end of the day. Because fingers change size through the day, judge the fit in the afternoon rather than first thing in the morning.
Final Thoughts
Ring sizing rewards a little patience. The chart gives you the numbers – 16.51 millimeters for a US 6, 17.35 for a US 7, and steady steps from size 3 to 13 – but the measurement behind the numbers is what decides whether a ring becomes a daily favorite or a drawer occupant. Measure with paper rather than stretchy string, measure the exact finger on the exact hand, and measure in the afternoon when your hands are at their normal size. Convert through millimeters when you are crossing between US, UK, and EU systems, and give wide bands the extra half size they usually want. Do that, and the number you order is the number you will still be happy wearing years from now.

I’m Elena Cross, a content writer at MeasuresIt.com, where I turn complex measures, units, and mathematical concepts into clear, accurate, and easy-to-read articles. I’m passionate about precision in numbers and in words and I write to help readers actually understand measurements, not just memorize them.